 |
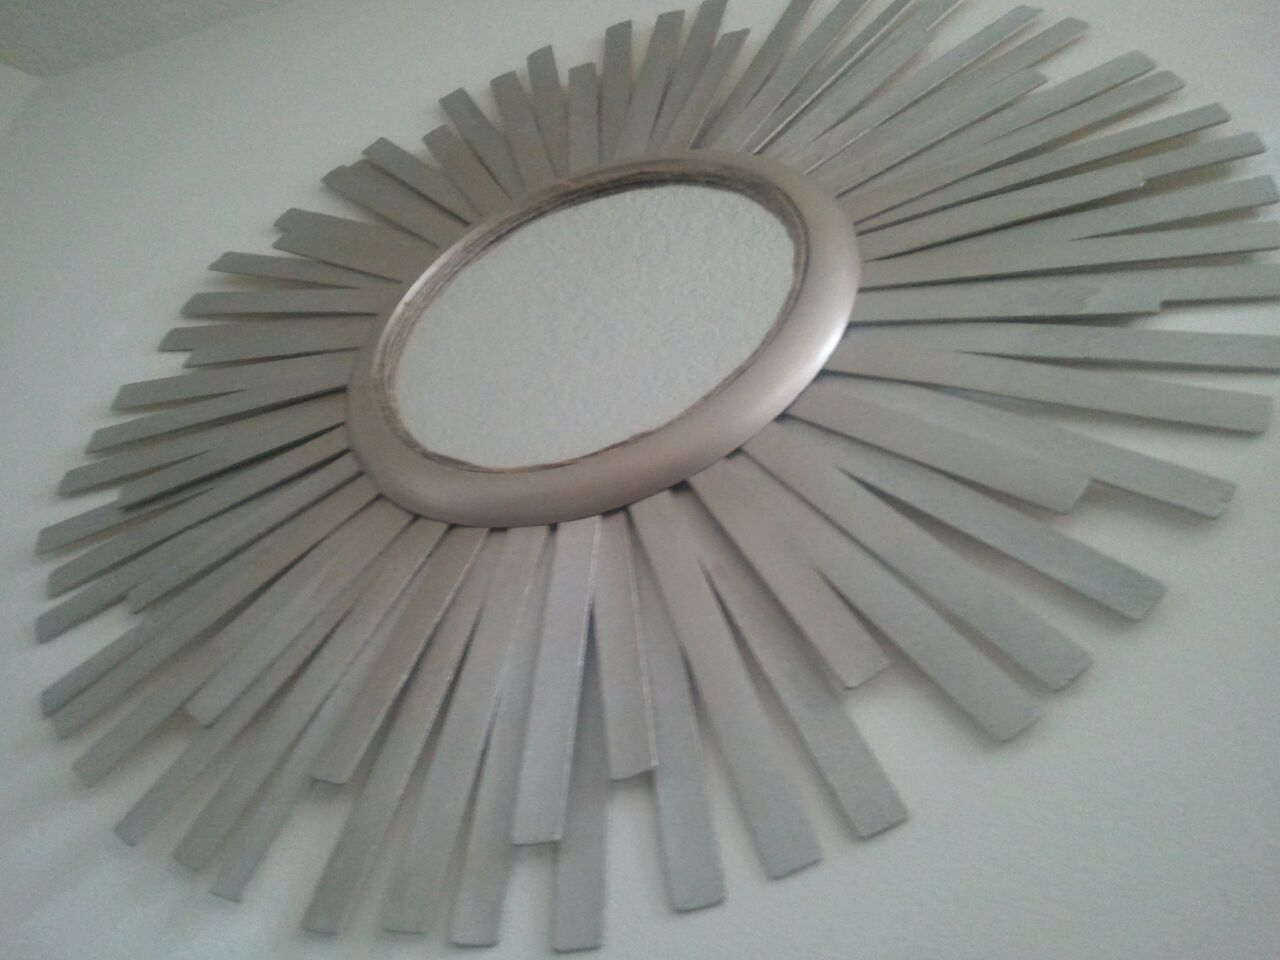
| My “new” Sunburst Mirror that will be a focal point in my Living Room Makeover! |
I am so excited to share my how to on one of my latest projects! I have seen a few of these floating around but decided that I wanted to upcyle something fairly hideous into something I love for my living room makeover. While I was out thrifting recently I came across a purple plastic mirror. This is how it looked before:
 |
| I think this is very similar to the mirror I applied frosty eye shadow in back in the day… |
After bringing this little lovely home, it sat in my garage for a few days while I figured out what I was going to use to make it wonderful. I decided on paint stir sticks and bought a box of 100 from my local paint shop for a few bucks. I then chose a color. I decided to go with Krylon Paint in Caramel Latte it has just enough sparkle without being too much for this project. I then fired up my handy little glue gun (I use hi-temp, while I am probably missing important parts of my fingerprints it works wonderfully. It’s a trade off and worth it) and begin to glue my sticks into place. I did one shorter layer first that would be in the front, and followed it up with a second, longer layer behind it. As you can see here:

I carefully turned the mirror over a few times to make sure I liked the placement of the stir sticks, and added a few more in some of the bare spots. I could have measured and glued the sticks very carefully, but I didn’t want the mirror to look perfect, I wanted the pieces to be uneven here and there so it didn’t look like it came out of a mold. I am sure you are also far more patient than I am, as I am totally down with instant gratification and would certainly go mad late at night in my garage with too much measuring. I cut a piece of picture hanging wire from an old frame (future project) and glued it into place. I let it cool and made sure everything was stable before I turned the piece over to prep and paint.

I used some paper and tape to cover the mirror well, and spray painted my sweet new mirror twice, letting it dry for a bit between coats. At this point I was pretty pumped as I have wanted one of these for a while but was not willing to fork over big bucks for something I knew I could DIY.
Here is the paint I used, I love this color and will probably do a couple sconces or some frames in the room to pull it all together.
What is this mug with a broken handle and half-eaten candy bar in the tutorial for? Because I am giving you a sneak peak at my late night crafting fuel. Yep, Diet Coke, diet because I am watching my calories, and a big ol’ chocolate bar. Not diet because that would be weird right? Ok, I’m amped out now and ready to hang this baby up!
And voila! I took an up close pic because I do not have my mantel installed yet, or the walls painted. I’m a little impatient sometimes…
So, that’s it. And, I noticed a tiny bit of purple plastic right on the very edge of the mirror so I hot glued in a bit of jute twine to cover it up. I like the natural look with the mirror and wood. Looks like I intentionally did it that way. I try to never trash a project that just needs little adjustment, and I usually end up liking it better than the original design.
Happy DIY’ing
Hugs, Tanya 🙂


4 Responses
I love this! I will put this on my to do list for sure!
tiLNM1 pretty valuable stuff, overall I feel this is worth a bookmark, thanks
Payout reliability is one of the areas where https://888starz-casino.so/ maintains a consistent record. The platform operates under a valid licence that carries regulatory obligations regarding player fund protection and fair treatment of winnings, which provides a meaningful baseline of accountability. The terms and conditions are written clearly without the vague clauses that less reputable operators use to create grounds for voiding legitimate winnings, and withdrawal requests from players who meet the standard account verification requirements are processed without the tactics designed to discourage or delay payouts. For players who have had frustrating experiences with casinos that found reasons not to pay out, choosing a licensed platform with a clear operational track record is the most practical way to reduce that risk significantly.